|
[?]Subscribe To This Site
|
If you are looking for information about how to frame a house, this page is a continuation of framing a house which discussed the very first step in house framing instructions. In this step of wood frame construction, the house framing techniques such as different method for framing walls is discussed. Following the exterior wall layout and verifications, it is time to install stud walls. In order to layout the stud spacing within a wall, you need to know where in the construction plans to find the stud spacing. Since stud walls is designed by structural engineer, the information can be found in the structural plans, structural details or schedule sheets.If no structural drawings exists, look in the architectural plans, details, or building section. Sometimes in the permit set from the city, it often has structural calculations from local engineer. These city's permit set in most cases has the stud wall design on it with stud spacing.
Due to wall sheathing standard dimension of 4'x8', stud walls are typically spaced 16 or 24 inches on center. There are times when required for structural reasons, the studs can be spaced 8 or 12 inches on center usually for very tall walls 14 to 16 high walls but are very rare in residential construction. 
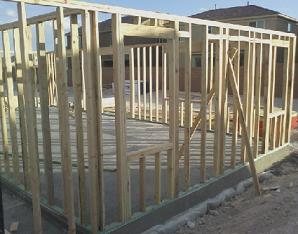
To start framing walls, take a pressure treated bottom plate and another as the top plate, both of equal length that match the wall length. On a flat surface, lay down both pieces side by side and proceed to mark the stud location. For structural reasons, every wall begins and ends with a stud, even at splice location for top and bottom plate require studs. After marking the first stud, proceed to mark 16 inches center to center. Notice the use of “on center” which means the markings are for the centerline of the studs. Since the nominal or actual thickness of 2xs is 1.5 inches, the edge of the stud should offset 3/4 inches from centerline. Once the studs is marked, take the pressure treaded piece and lay it adjacent to the anchor bolts. With a pencil mark the location of the anchor bolts and measure from the side of the wall already marked on the slab or foundation, measure the location of the anchor bolt. Transfer the mark to the treaded lumber and drill the holes for the anchor bolts. You are now ready to nail together the stud wall. Spread the studs to match the markings previously done on the treated bottom plate and the top plate. Back to how to frame a house |
|


 Should there be discrepancy between structural plans and architectural plans in regard to stud size and spacing always, make sure to clarify with architect before proceeding with framing. Sometimes due to insulation requirement, the architect may specify 2x6 studs but structural engineer calls out 2x4. You don't want to get caught using wrong size or spacing because it can get ugly and costly to repair.